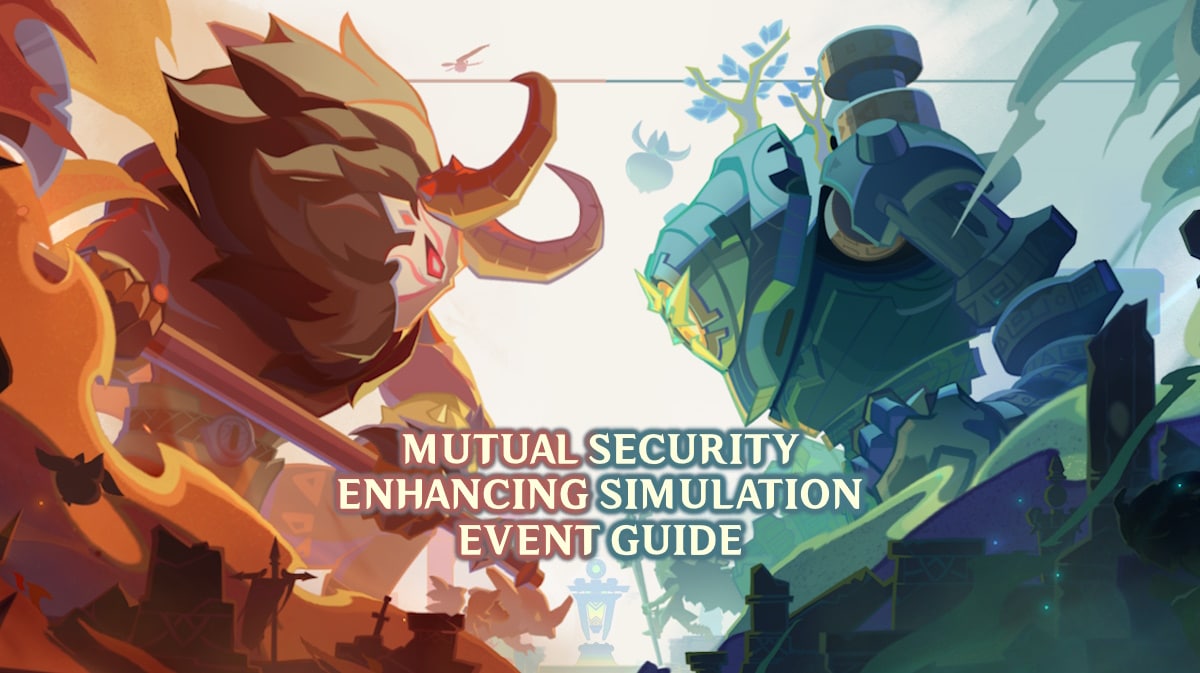
In this guide, we will tackle how to take on both the Assault and the Defense Scneario of the Mutual Security Enhancing Simulation, Genshin Impact Version 4.7's main event.
Mutual Security Enhancing Simulation Event
Let's start off with the event's basics. The Mutual Security Enhancing Simulation Event in Genshin Impact is not your usual combat event, as you don't directly fight enemies. Instead, you deploy units and towers to do the fighting for you.
The units that the player has access to are divided into three groups, which dictate their play style. These are Single-Target, Team, and AoE units. Furthermore, the units also have separate attack styles: Melee, Ranged, and Flying.

This is important, as there is a rock-paper-scissors-esque combat mechanic in place. Single-Target units can burst down AoE Units, which can easily defeat every unit in a team, who can easily overpower Single-Target enemies.
Melee units can easily take down Ranged units with no close-quarters combat abilities, while Ranged units can take down Flying units. Finally, Flying units can easily take down Melee units that cannot reach them. When choosing a team, players must take these Suppression Rules to counter the enemy.
Players also have access to Leadership Skills, powerful Elemental Attacks that can deal damage to enemies, as well as apply Elements on them. These have a long cooldown, so players must save their Leadership Skills for when they need it most, such as some emergency damage, or to quickly take down bigger enemies.
As for rewards, this event will reward the usual Primogems, Leveling Materials, Weapon and Skill materials, and Mora. Additionally, players can also get the 4-Star Bow Cloudforged once they reach a certain amount of Analysis Progress. Players can also get its Refinement Material, the Cam and Cables of Law.
As of this article, it is now possible to get the Bow and all of its Refinement Materials.
Now that we have discussed the Mutual Security Enhancing Simulation event basics, let's dive into our guide for the Assault and Defense Scenarios of the game, which have their own unique rules.
Assault Scenario
As the name implies, the Assault Scenario has players actively attacking the enemy, with the goal of destroying the enemy's main tower. To do so, the player must build a team that can counter the enemy's team, allowing them to push forward and destroy the enemy's base.
When deploying units, players can only deploy around towers that they own. After destroying and capturing any of the enemy's towers, players will be able to start deploying around said towers. This allows the player to deploy their troops closer to the final goal.
Now, let's dive into each level.
Power Algorithm
Opponents
- Pyro Slime (Team, Melee)
- Electro Slime (Team, Melee)
- Hilichurl Fighter (Team, Melee)
- Electro Cicin (Team, Flying)
- Electro Hilichurl Shooter (Team, Ranged)
- Cryo Hilichurl Shooter (Team, Ranged)
As the enemy team consists of Team units, bringing AoE units is the best move. That way, they can easily take down the enemy team.
Possible Lineup
- Eremite Sunfrost (AoE, Melee)
- Treasure Hoarder Pyro Potioneer (AoE, Ranged)
- Blazing Axe Mitachurl (AoE, Melee)
- Electro Slime (Team, Melee)
- Hydro Cicin (Team, Flying)
- Cryo Hilichurl Shooter (Team, Ranged)
Leadership Skill: Sweeping Whirlwind
- The wild winds converge, drawing in opponents within a certain radius for 6s and dealing Anemo DMG. 45s CD. Has 2 initial usages.
Deploy the AoE Melee to deal with the slimes and Hilichurls. Meanwhile, deploy the ranged units once the Electro Cicin arrives. Deploy other units as needed.
Outflank and Encircle
Opponents
- Kairagi: Dancing Thunder (Single-Target, Melee)
- Kairagi: Fiery Might (Single-Target, Melee)
- Cryo Specter (Single-Target, Flying)
- Pyro Specter (Single-Target, Flying)
- Nobushi: Kikouban (Single-Target, Ranged)
- Hydro Samachurl (Single-Target, Ranged)
Since the enemy are all Single-Target units, overwhelm them with Team units.
Possible Lineup
- Pyro Slime (Team, Melee)
- Electro Slime (Team, Melee)
- Hilichurl Fighter (Team, Melee)
- Cryo HIlichurl Shooter (Team, Ranged)
- Electro HIlichurl Shooter (Team, Ranged)
- Electro Cicin (Team, Flying)
Leadership Skill: Blazing Breakthrough
- Unleashes flames that deal Pyro DMG to opponents and lower their DEF. 45s CD. Has 2 initial usages.
Deploy the Slimes, Fighter, and Cicin as needed to fight against the ground units. Once the Specters start spawning, bring out the Shooters.
Saturation Fire Theory
Opponents
- Blazing Axe Mitachurl (AoE, Ranged)
- Geovishap Hatchling (AoE, Melee)
- Hydro Mimic Finch (AoE, Melee)
- Ruin Guard (Siege, Melee)
- Hydro Cicin (Team, Flying)
- Treasure Hoarder Pyro Potioneer (AoE, Ranged)
Since the enemy is mostly AoE units, combat them with Single-Target units. Bring along some AoE units as
Possible Lineup
- Kairagi: Dancing Thunder (Single-Target, Melee)
- Kairagi: Fiery Might (Single-Target, Melee)
- Cryo Specter (Single-Target, Flying)
- Pyro Specter (Single-Target, Flying)
- Blazing Axe Mitachurl (AoE, Melee)
- Eremite Sunfrost (AoE, Melee)
Leadership Skill: Blazing Breakthrough
- Unleashes flames that deal Pyro DMG to opponents and lower their DEF. 45s CD. Has 2 initial usages.
The biggest problem here is the Ruin Guard. While the ruin Guard is not there, deploy the Specters and AoE units first. When the Ruin Guard appears, deploy your Kairagis to deal with it.
Contested River Crossings
Opponents
- Hilichurl Fighter (Team, Melee)
- Nimble Harvester Mek – Pneuma (AoE, Melee)
- Suppression Specialist Mek – Ousia (Single-Target, Ranged)
- Treasure Hoarder Pyro Potioneer (AoE, Ranged)
- Hydro Samachurl (Single-Target, Ranged)
- Bubbler Seahorse (AoE, Ranged)
This enemy team has a little bit of everything, with more AoE units than Single-Target and Team. Bring Single-Target units, as well as some other units to round it out.
Possible Lineup
- Hydro Mimic Finch (AoE, Melee)
- Geovishap Hatchling (AoE, Melee)
- Cryo Specter (Single-Target, Flying)
- Cryo Hilichurl Shooter (Team, Ranged)
- Kairagi: Dancing Thunder (Single-Target, Melee)
- Kairagi: Fiery Might (Single-Target, Melee)
Leadership Skill: Sweeping Whirlwind
- The wild winds converge, drawing in opponents within a certain radius for 6s and dealing Anemo DMG. 45s CD. Has 2 initial usages.
Hold on to the Hydro Mimic Finch and Geovishap Hatchlings as they can be deployed anywhere. Deploy the other units as normal, and use both the Mimic and Hatchlings as reinforcements for units that seem to be having a hard time.
Maneuver, Maneuver, and More Maneuver
Opponents
- Eremite Sunfrost (AoE, Melee)
- Eremite Desert Clearwater (Single-Target, Melee)
- Cryo Specter (Single-Target, Flying)
- Electro Cicin (Team, Flying)
- Hydro Cicin (Team, Flying)
- Floating Anemo Fungus (AoE, Flying)
Similar to the previous level, this team is well balanced, so bring your own team of balanced units to counter them.
Possible Lineup
- Suppression Specialist Mek – Ousia (Single-Target, Ranged)
- Nobushi: Kikouban (Single-Target, Ranged)
- Treasure Hoarder Pyro Potioneer (AoE, Ranged)
- Bubbler Seahorse (AoE, Ranged)
- Ruin Guard (Siege, Melee)
- Electro Cicin (Team, Flying)
Leadership Skill: Sweeping Whirlwind
- The wild winds converge, drawing in opponents within a certain radius for 6s and dealing Anemo DMG. 45s CD. Has 2 initial usages.
Simply match the units you have to the enemy units based on the suppression rules. Remember: AoE beats Team beats Single-Target beats AoE.
Tactical Reserves
Opponents
- Pyro Slime (Team, Melee)
- Electro Slime (Team, Melee)
- Hydro Mimic Finch (AoE, Melee)
- Pyro Specter (Single-Target, Flying)
- Cryo Specter (Single-Target, Flying)
- Bubbler Seahorse (AoE, Ranged)
The enemy team has a balanced mix of Team, Single-Target, and AoE units. They are, however, mostly elemental, so take advantage of that to use Elemental Reactions and deal a lot of damage. Swirl is also a good option here.
Possible Lineup
- Eremite Sunfrost (AoE, Melee)
- Nimble Harvester Mek – Pneuma (AoE, Melee)
- Floating Anemo Fungus (AoE, Flying)
- Hydro Cicin (Team, Flying)
- Bubbler Seahorse (AoE, Ranged)
- Electro HIlichurl Shooter (Team, Ranged)
Leadership Skill: Sweeping Whirlwind
- The wild winds converge, drawing in opponents within a certain radius for 6s and dealing Anemo DMG. 45s CD. Has 2 initial usages.
As mentioned above, take advantage of Elemental Reactions to quickly take down enemies. Make sure to take the slimes and flying enemies quickly, as they can easily bypass and overrun your towers.
Crushing Pincer Maneuver
Opponents
- Eremite Sunfrost (AoE, Melee)
- Nimble Harvester Mek – Pneuma (AoE, Melee)
- Floating Anemo Fungus (AoE, Flying)
- Ruin Guard (Siege, Melee)
- Cryo HIlichurl Shooter (Team, Ranged)
- Suppression Specialist Mek – Ousia (Single-Target, Ranged)
The enemy team has a lot of AoE Units, so take them down with Single-Target units.
Possible Lineup
- Eremite Desert Clearwater (Single-Target, Melee)
- Kairagi: Dancing Thunder (Single-Target, Melee)
- Suppression Specialist Mek – Ousia (Single-Target, Ranged)
- Cryo Specter (Single-Target, Flying)
- Bubbler Seahorse (AoE, Ranged)
- Electro Slime (Team, Melee)
Leadership Skill: Momentous Wave
- Attack your opponents with billowing waves, dealing AoE Hydro DMG, and causing nearby allied units to recover health over the next 2.5 seconds. 45s CD. Has 2 initial usages.
Use your Single-Target units to combat the enemy AoE units. Only place the Bubbler Seahorse and Electro Slime to counter the Cryo Hilichurl Shooters and Suppression Specialist Mechs respectively. Use the leadership Skill more for suits healing than its damage.
As of this article, all of the Assault Scenario levels of the Mutual Security Enhancing Simulation event in Genshin Impact have been released, as such this guide is complete.
Defense Scenario
The Defense Scenario is different in two ways. The first is that it is wave-based, with players having time to prepare in between each wave. Second, instead of attacking and destroying the enemy's tower, players must instead protect their towers from getting attacked.
Whenever enemies get defeated, players have a chance to get units or towers to place down. It is not required to place them down immediately. It is better for players to hold onto the units and towers until they are needed.
One last thing to note is that the lineup is fixed for all Defense Scenarios.
Build an AA Umbrella
Opponents
- Wave 1
- Electro Cicin (Team, Flying)
- Electro Slime (Team, Melee)
- Blazing Axe Mitachurl (AoE, Melee)
- Wave 2
- Hydro Cicin (Team, Flying)
- Blazing Axe Mitachurl (AoE, Melee)
- Eremite Sunfrost (AoE, Melee)
- Wave 3
- Electro Cicin (Team, Flying)
- Hydro Cicin (Team, Flying)
- Pyro Slime (Team, Melee)
- Electro Slime (Team, Melee)
- Blazing Axe Mitachurl (AoE, Melee)
- Eremite Sunfrost (AoE, Melee)
Lineup
- Pyro Slime (Team, Melee)
- Electro Cicin (Team, Flying)
- Hydro Cicin (Team, Flying)
- Cryo Hilichurl Shooter (Team, Ranged)
- Treasure Hoarder Pyro Potioneer (AoE, Ranged)
- Stronghold Mechanism: Pyro
Leadership Skill: Sweeping Whirlwind
- The wild winds converge, drawing in opponents within a certain radius for 6s and dealing Anemo DMG. 45s CD. Has 2 initial usages.
Deploy the Shooter and Potioneer primarily on the Left Flank to counter the Flying Units. Deploy everyone else at the Center. Place the Stronghold Mechanicsm: Pyro between the Left Flank and Center so that it can attack both lanes. Use the Leadership Skill to take care of clumps of enemies.
Overwhelming Air Superiority
Opponents
- Wave 1
- Blazing Axe Mitachurl (AoE, Melee)
- Hydro Samachurl (Single-Target, Ranged)
- Hydro Mimic Finch (AoE, Melee)
- Cryo Hilichurl Shooter (Team, Ranged)
- Wave 2
- Blazing Axe Mitachurl (AoE, Melee)
- Hydro Samachurl (Single-Target, Ranged)
- Treasure Hoarder Pyro Potioneer (AoE, Ranged)
- Cryo Hilichurl Shooter (Team, Ranged)
- Wave 3
- Ruin Guard (Siege, Melee)
- Hydro Mimic Finch (AoE, Melee)
- Treasure Hoarder Pyro Potioneer (AoE, Ranged)
- Cryo Hilichurl Shooter (Team, Ranged)
Lineup
- Kairagi: Fiery Might (Single-Target, Melee)
- Cryo Specter (Single-Target, Flying)
- Nobushi: Kikouban (Single-Target, Ranged)
- Stronghold Mechanism: Hydro
- Shackling Mine
- Anti-Personnel Mine
Leadership Skill: Blazing Breakthrough
- Unleashes flames that deal Pyro DMG to opponents and lower their DEF. 45s CD. Has 2 initial usages.
Deploy your Hydro towers between the Center and Right Flank so that they can attack both lanes. Reserve your Mines for the Center Lane, as that is the Ruin Guard's lane. Deploy your units as necessary whenever the enemy units spaw. Specters are best deployed at the center thanks to the lack of anti-air units.
Force Concentration
Opponents
- Wave 1
- Kairagi: Dancing Thunder (Single-Target, Melee)
- Electro Slime (Team, Melee)
- Nobushi: Kikouban (Single-Target, Ranged)
- Cryo Specter (Single-Target, Flying)
- Wave 2
- Kairagi: Fiery Might (Single-Target, Melee)
- Pyro Slime (Team, Melee)
- Nobushi: Kikouban (Single-Target, Ranged)
- Pyro Specter (Single-Target, Flying)
- Wave 3
- Kairagi: Fiery Might (Single-Target, Melee)
- Pyro Slime (Team, Melee)
- Pyro Specter (Single-Target, Flying)
- Cryo Specter (Single-Target, Flying)
- Kairagi: Dancing Thunder (Single-Target, Melee)
- Electro Slime (Team, Melee)
Lineup
- Electro Slime (Team, Melee)
- Blazing Axe Mitachurl (AoE, Melee)
- Hilichurl Fighter (Team, Melee)
- Hydro Cicin (Team, Flying)
- Bubbler Seahorse (AoE, Ranged)
- Stronghold Mechanism: Cryo
Leadership Skill: Blazing Breakthrough
- Unleashes flames that deal Pyro DMG to opponents and lower their DEF. 45s CD. Has 2 initial usages.
Deploy the AoE units on the Left Flank, and the Team units on the Right Flank. Primarily deploy the Stronghold Mechanism: Cryo on the Left Flank to supplement the units. Should you find one lane or the other overwhelmed, deploy units as needed.
Flexible Defensive Countermeasures
Opponents
- Wave 1
- Electro Cicin (Team, Flying)
- Hydro Cicin (Team, Flying)
- Eremite Sunfrost (AoE, Melee)
- Eremite Desert Clearwater (Single-Target, Melee)
- Wave 2
- Eremite Sunfrost (AoE, Melee)
- Eremite Desert Clearwater (Single-Target, Melee)
- Wave 3
- Electro Cicin (Team, Flying)
- Hydro Cicin (Team, Flying)
- Floating Anemo Fungus (AoE, Flying)
- Ruin Guard (Siege, Melee)
Lineup
- Nimble Harvester Mek – Pneuma (AoE, Melee)
- Cryo Specter (Single-Target, Flying)
- Pyro Specter (Single-Target, Flying)
- Suppression Specialist Mek – Ousia (Single-Target, Ranged)
- Bubbler Seahorse (AoE, Ranged)
- Stronghold Mechanism: Electro
Leadership Skill: Momentous Wave
- Attack your opponents with billowing waves, dealing AoE Hydro DMG, and causing nearby allied units to recover health over the next 2.5 seconds. 45s CD. Has 2 initial usages.
Deploy Specters and the Bubbler on the Left Flank, and the rest in the Center. Place the Stronghold Mechanism: Electro between the Left Flank and Center. In Wave 2, focus on deploying units in the Center. In Wave 3, deploy extra units instead in the Left Flank.
Stronghold FIrepower Response
Opponents
- Wave 1
- Nimble Harvester Mek – Pneuma (AoE, Melee)
- Bubbler Seahorse (AoE, Ranged)
- Wave 2
- Ruin Guard (Siege, Melee)
- Cryo Specter (Single-Target, Flying)
- Pyro Specter (Single-Target, Flying)
- Wave 3
- Nimble Harvester Mek – Pneuma (AoE, Melee)
- Suppression Specialist Mek – Ousia (Single-Target, Ranged)
- Bubbler Seahorse (AoE, Ranged)
- Ruin Guard (Siege, Melee)
- Cryo Specter (Single-Target, Flying)
- Pyro Specter (Single-Target, Flying)
Lineup
- Eremite Sunfrost (AoE, Melee)
- Eremite Desert Clearwater (Single-Target, Melee)
- Floating Anemo Fungus (AoE, Flying)
- Suppression Specialist Mek – Ousia (Single-Target, Ranged)
- Stronghold Mechanism: Electro
- Shackling Mine
Leadership Skill: Momentous Wave
- Attack your opponents with billowing waves, dealing AoE Hydro DMG, and causing nearby allied units to recover health over the next 2.5 seconds. 45s CD. Has 2 initial usages.
Deploy the Eremites in the Center to take care of the ground units. Deploy Fungus, Mek, and Stronghold Mechanism: Electro on the Right Flank to take care of the Specters and the Ruin Guard. Reserve Shackling Mines for the Ruin Guards to keep them in place.
Use Momentous Wave to heal up low HP units, especially if they are the only ones defending an areas.
Effective AoE and Delaying Actions
Opponents
- Wave 1
- Ruin Guard (Siege, Melee)
- Hilichurl Fighter (Team, Melee)
- Cryo Hilichurl Shooter (Team, Ranged)
- Wave 2
- Ruin Guard (Siege, Melee)
- Hilichurl Fighter (Team, Melee)
- Blazing Axe Mitachurl (AoE, Melee)
- Wave 3
- Ruin Guard (Siege, Melee)
- Hilichurl Fighter (Team, Melee)
- Cryo Hilichurl Shooter (Team, Ranged)
- Blazing Axe Mitachurl (AoE, Melee)
Lineup
- Blazing Axe Mitachurl (AoE, Melee)
- Pyro Specter (Single-Target, Flying)
- Electro Cicin (Team, Flying)
- Treasure Hoarder Pyro Potioneer (AoE, Ranged)
- Stronghold Mechanism: Cryo
- Stronghold Mechanism: Anemo
Focus your AoE Units and the Stronghold Mechanism: Anemo on the Right Flank. Everything else goes to the Left Flank to take down the Ruin Guard.
Minefield-Supported Combined Arms Operation
Opponents
- Wave 1
- Eremite Sunfrost (AoE, Melee)
- Electro Cicin (Team, Flying)
- Pyro Slime (Team, Melee)
- Wave 2
- Ruin Guard (Siege, Melee)
- Electro Cicin (Team, Flying)
- Hydro Cicin (Team, Flying)
- Bubbler Seahorse (AoE, Ranged)
- Wave 3
- Nimble Harvester Mek – Pneuma (AoE, Melee)
- Suppression Specialist Mek – Ousia (Single-Target, Ranged)
- Hydro Mimic Finch (AoE, Melee)
- Bubbler Seahorse (AoE, Ranged)
Lineup
- Kairagi: Fiery Might (Single-Target, Melee)
- Eremite Sunfrost (AoE, Melee)
- Cryo Hilichurl Shooter (Team, Ranged)
- Bubbler Seahorse (AoE, Ranged)
- Stronghold Mechanism: Pyro
- Anti-Personnel Mine
Deploy the Cryo Hilichurl Shooter and Bubbler Seahorse at the center. Put the Bubbler nearer close to the right flank to help with the slimes at Wave 1. The Kairagi and the Hilichurl Shooters can be deployed on the Left Flank. Just make sure to keep the Shooters away from the AoE units to keep them safe.
The Eremite can go on the Right Flank, with the Mines helping out either the Right or Left Flank depending on where it's needed. The Stronghold Mechanism: Pyro should be placed in the Center lane.
As of this article, all of the Defense Scenario levels of the Mutual Security Enhancing Simulation event in Genshin Impact have been released, as such this guide is complete.
That's all for our guide to the Mutual Security Enhancing Simulation event in Genshin Impact. The event has a little under a week left, so make sure to finish the event soon to get the rewards.
Check out our gaming news articles for the latest in gaming news.

